 Automation Hub
Documentation
Automation Hub
Documentation
Getting Started
The Automation Hub greatly simplifies automating Micro-Vu measuring machines. It supports controlling and synchronizing multiple machines at once using an intuitive visual programming interface. For integrating with other devices, the program can accept ModbusTCP/IP connections and allow read and write access to registers.
Network Topology
To get started it is helpful to understand where this program fits in. There are many possible configurations to fit the need of any automation setup.
-
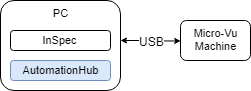
In the simplist case, one machine is controlled and the Automation Hub is ran on same computer as InSpec. This setup is useful for running a sequence of InSpec programs automatically or changing programs dynamically based on feature measurements.
-
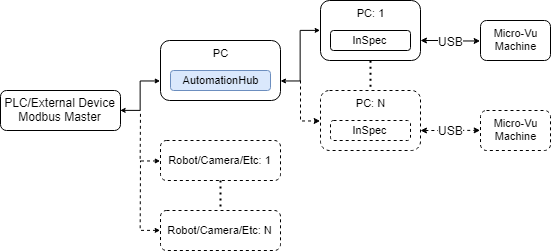
A slightly more complicated case, here multiple machines are controlled. The Automation Hub can run on a separate computer or on one running InSpec.

-
This is the most advanced setup. The Automation Hub can act as a slave for a PLC or other Modbus enabled devices. Multiple Micro-Vu machines can be integrated with robots and other external devices to create a fully automated cell. The Automation Hub handles all the complications of controlling the machines internally while exposing a simple, customizable interface to the user.
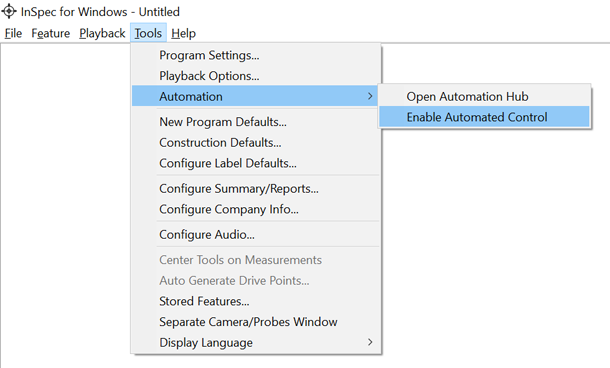
To enable automated control of InSpec, navigate to Tools>Automation>Enable Automated Control.
User Interface
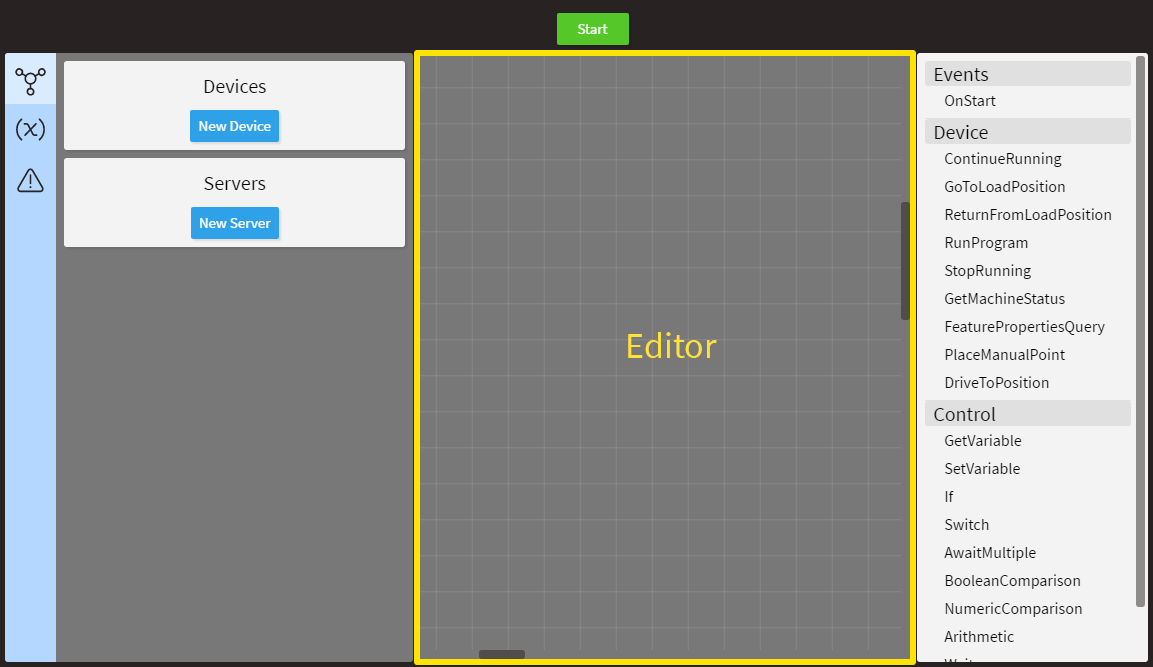
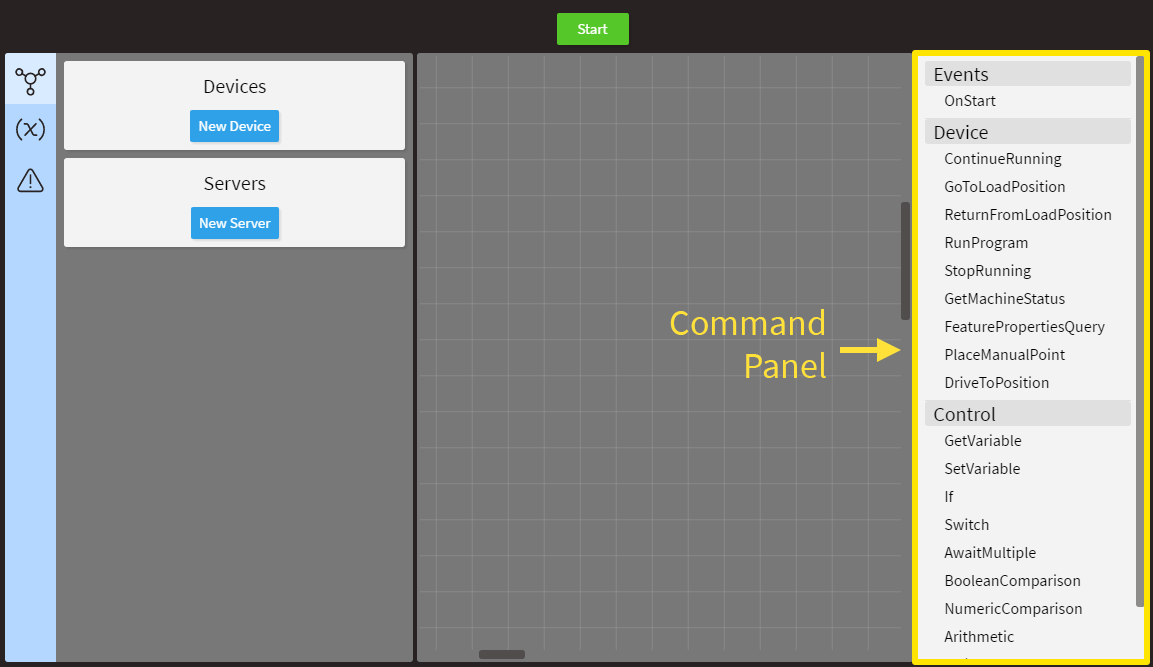
The interface is split into 3 main sections:
- Config Panel
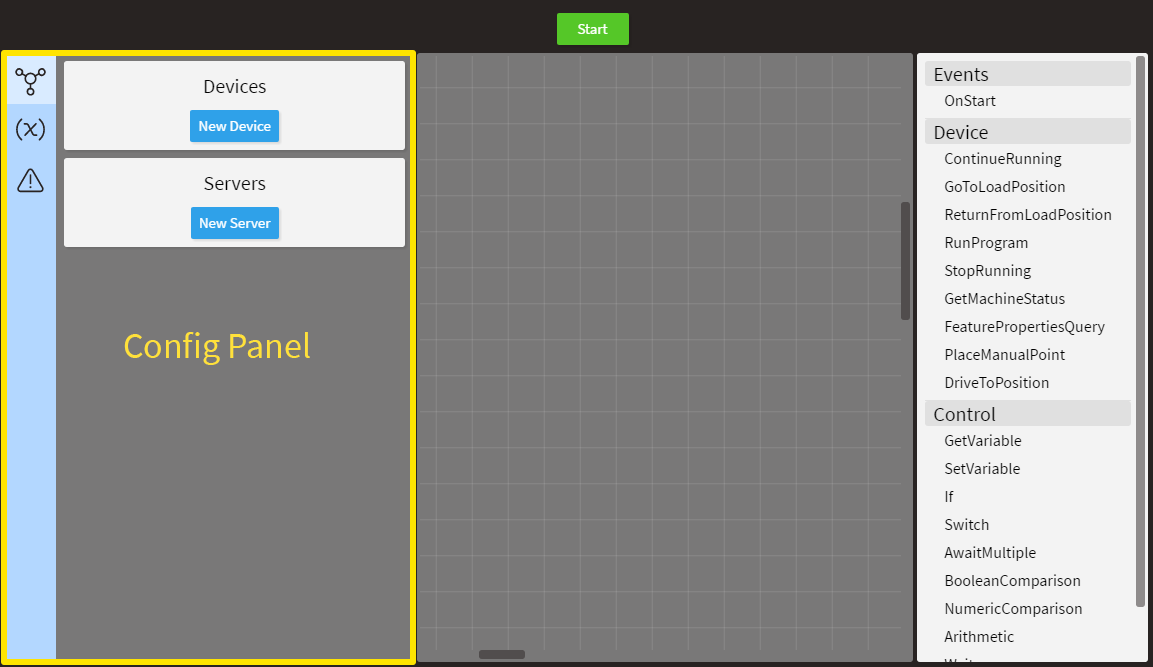
- Editor
- Command Panel
Config Panel
The config panel is located on the left side. It usually the first thing used when starting a new program. It has 3 different tabs that can be clicked to change between different panels.
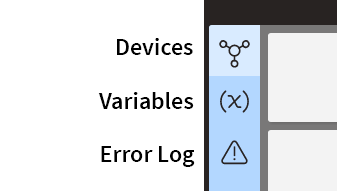
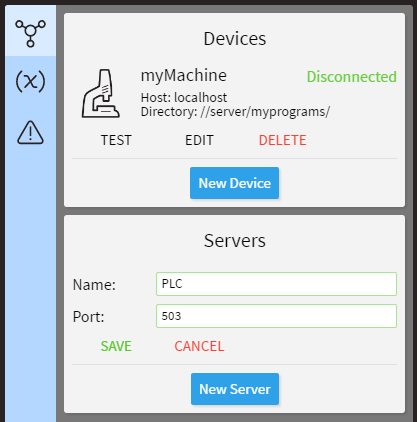
I. Devices
The first tab is the Devices tab.
Devices are for connecting to remote PCs with Micro-Vu machines attached. The Name is just for identifying the device within the program. Host is the hostname of the PC on the network. An IP address can also be entered. Directory should be an absolute path to the directory containing InSpec programs. The InSpec programs need to be accessible client-side so it is highly recommended to use a network drive.
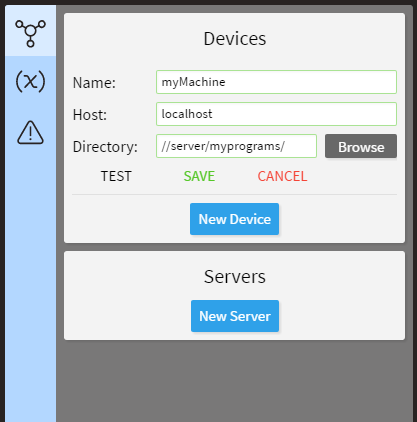
Servers allow PLCs or other Modbus enabled devices to connect to the Automation Hub.
Once connected, the servers can read and write to Modbus registers like with any other device.
To use the register values within a routine, a variable that is bound to a register address is needed.
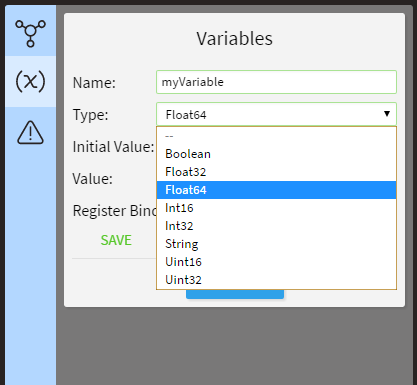
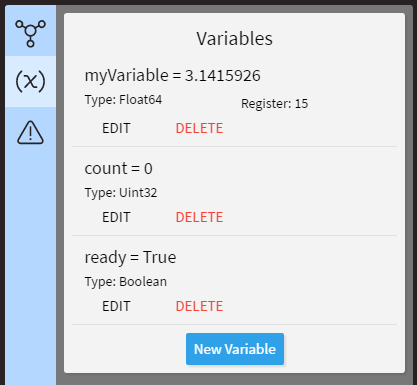
II. Variables
Variables are used to store values. They have a Name, a Type, and an Initial Value. The name should be descriptive of what the value represents. The type determines the size and layout of the variable’s memory; the range of values that can be stored within that memory; and the set of operations that can be applied to the variable. The available types are:
- Boolean: Stores either value True or False
- Float32: A single-precision floating point value
- Float64: A double-precision floating point value
- Int16: Signed integer value -32,768 to 32,767
- Int32: Signed integer value -2,147,483,648 to 2,147,483,647
- Uint16: Unsigned integer value 0 to 65,535
- Uint32: Unsigned integer value 0 to 4,294,967,295
- String: Text or character values
The correct type will depend on the application but for a general rule of thumb use:
- Boolean when the variable can only be True or False, or On or Off
- Int32 for counting
- Float64 for coordinates
- String for text and program names
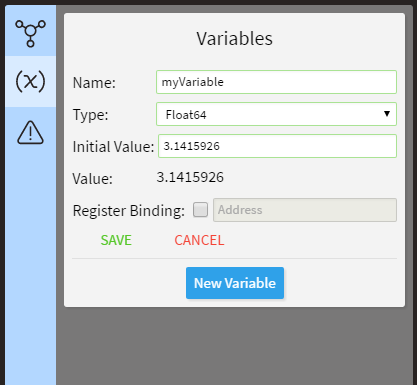
Variables can be given initial values.
The actual value is shown just below.
If no initial value is given the variable is given the value of undefined.
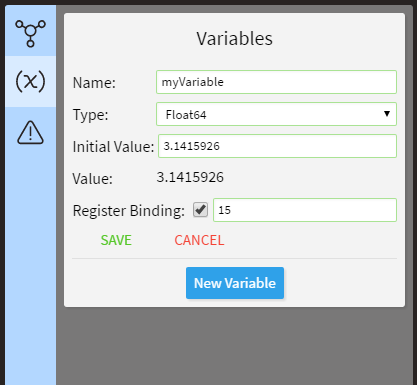
Advanced variable options
For advanced control, variables can be bound to a Modbus register. When a PLC or other device connects to the Automation Hub it can read and write to a set of registers. When a variable is bound to a register address, anytime the register value is changed the variable value is changed too. This is true in reverse as well, if the variable is changed in the routine the registers will update and a PLC can read the new value. There are two sets of registers. Boolean values are stored in one while all other values are stored in the other. Both sets have 1024 registers, with valid address ranges of (0-1023). All servers share the same registers.
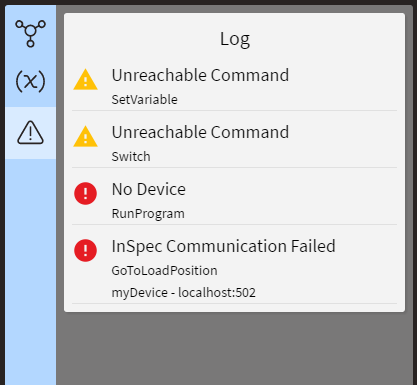
III. Log
The Log shows warnings and erros that may prevent the routine from running correctly. Warnings are shown with a yellow triangle and allow the routine to continue running. Errors are shown with a red circle and the routine will immediately stop when one is encountered.
Editor and Command Panel
The editor window is where the routine is created. The routine captures all the logic for running the program. Commands can be dragged in from the Command Panel on the right.
Commands can also be added using keyboard shortcuts
ssOnStartgsGetMachineStatus-
gvGetVariable crContinueRunninggtGoToLoadPositionrfReturnFromLoadPositionrrRunProgramsrStopRunninggfGetFeaturePropertyacPlaceManualPoint-
dtDriveToPosition svSetVariableffIfswSwitchawAwaitMultiplebcBooleanComparisonccNumericComparisonarArithmeticwwWaitzzStop
Left Mouse Button (LMB) can be used to select commands in the Editor.
Selected commands are highlighted in yellow.
Ctrl+LMB can be used to select multiple commands by clicking on each one.
Right Mouse Button (RMB) can be used to box select multiple commands quickly.
Selected commands can be moved by holding down LMB and draging.
Also, selected commands can be deleted using the Delete key and duplicated using Ctrl+d.
The window can be panned using the Middle Mouse Button (MMB) and zoomed using the scroll wheel.
Home can be used to center the view on all the commands.
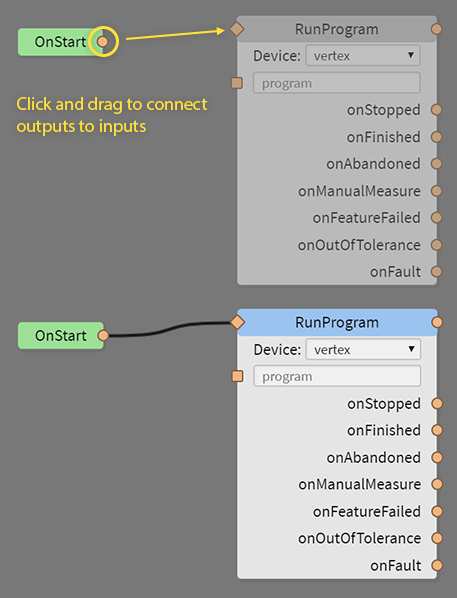
Click and drag with the LMB from either input or output to another to create a link.
While dragging only the invalid inputs/outputs will be hidden.
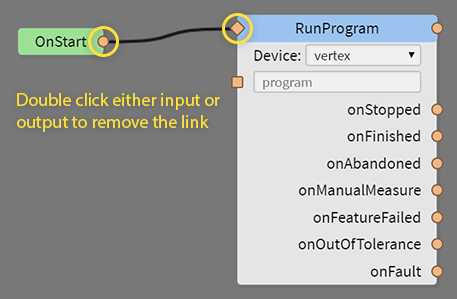
To remove links double click with the LMB to remove all links connected to the input/output.
Ctrl+r can be used to start and stop the routine.
Ctrl+s will save the current program.
Ctrl+shift+s to save the current program as a new file.
Ctrl+n to create a new program.
Ctrl+o to open an existing program.